
While at Home Depot, I picked up some Behr Ultra Premium black paint.

My husband was gone at a friend's house watching our Boise State football team, (#2!!) so I had to unload this monster all by myself. Well, I am a P90X graduate - you know - "Regular to ripped in 90 days"...um... then back to regular again in 30. :} Ha, Ha! Yep, that's me!
I finished sanding it right away. I used an 80 grit sandpaper on my mouse sander. Then it sat. For about 4 weeks. I was waiting to paint it until I got my spray gun.

I took Cassie's advice over at Primitive and Proper and skipped the primer on this one and went straight to painting since this was going to be black. Here is what the brown credenza looked like after the spray gun showed up (this really isn't a great pic, but doesn't my grass look nice and green?)...

Oh my goodness, the paint went on so fast and beautifully! Because I don't have to dilute the paint, this spray gun lays down a nice thick coat. I did a second coat just on the top.
Later, I found 2 scratches on the top of the credenza. I was hoping I could just buff it out, but no. I had to roll on a couple of coats to fix it.

I'm not naming any names, but I have a feeling it was caused by a certain someone trying to move a certain blue bike out of the garage.

I saw Christa's post over at Stories of A House about how to do a rubbed-through distressed finish, and I had to try it! Christa has a really informative post and a video tutorial about exactly how to do this.
First thing, I went to Lowe's and bought all my necessary materials~

Denatured Alcohol
Steel Wool Grade #0000
Rubber Gloves


I sealed it with Minwax Wipe-On Poly.

I wanted to make the inside cupboards and drawers a little more fun than just black, so I pulled out my Woodlawn Charm.

Of course I first primed the cupboards and drawers with my $5 Zinsser mis-tint primer~

It's oil-based and stinky, but it matches my Woodlawn Charm almost perfectly!
Here are the drawers painted in this fun color~

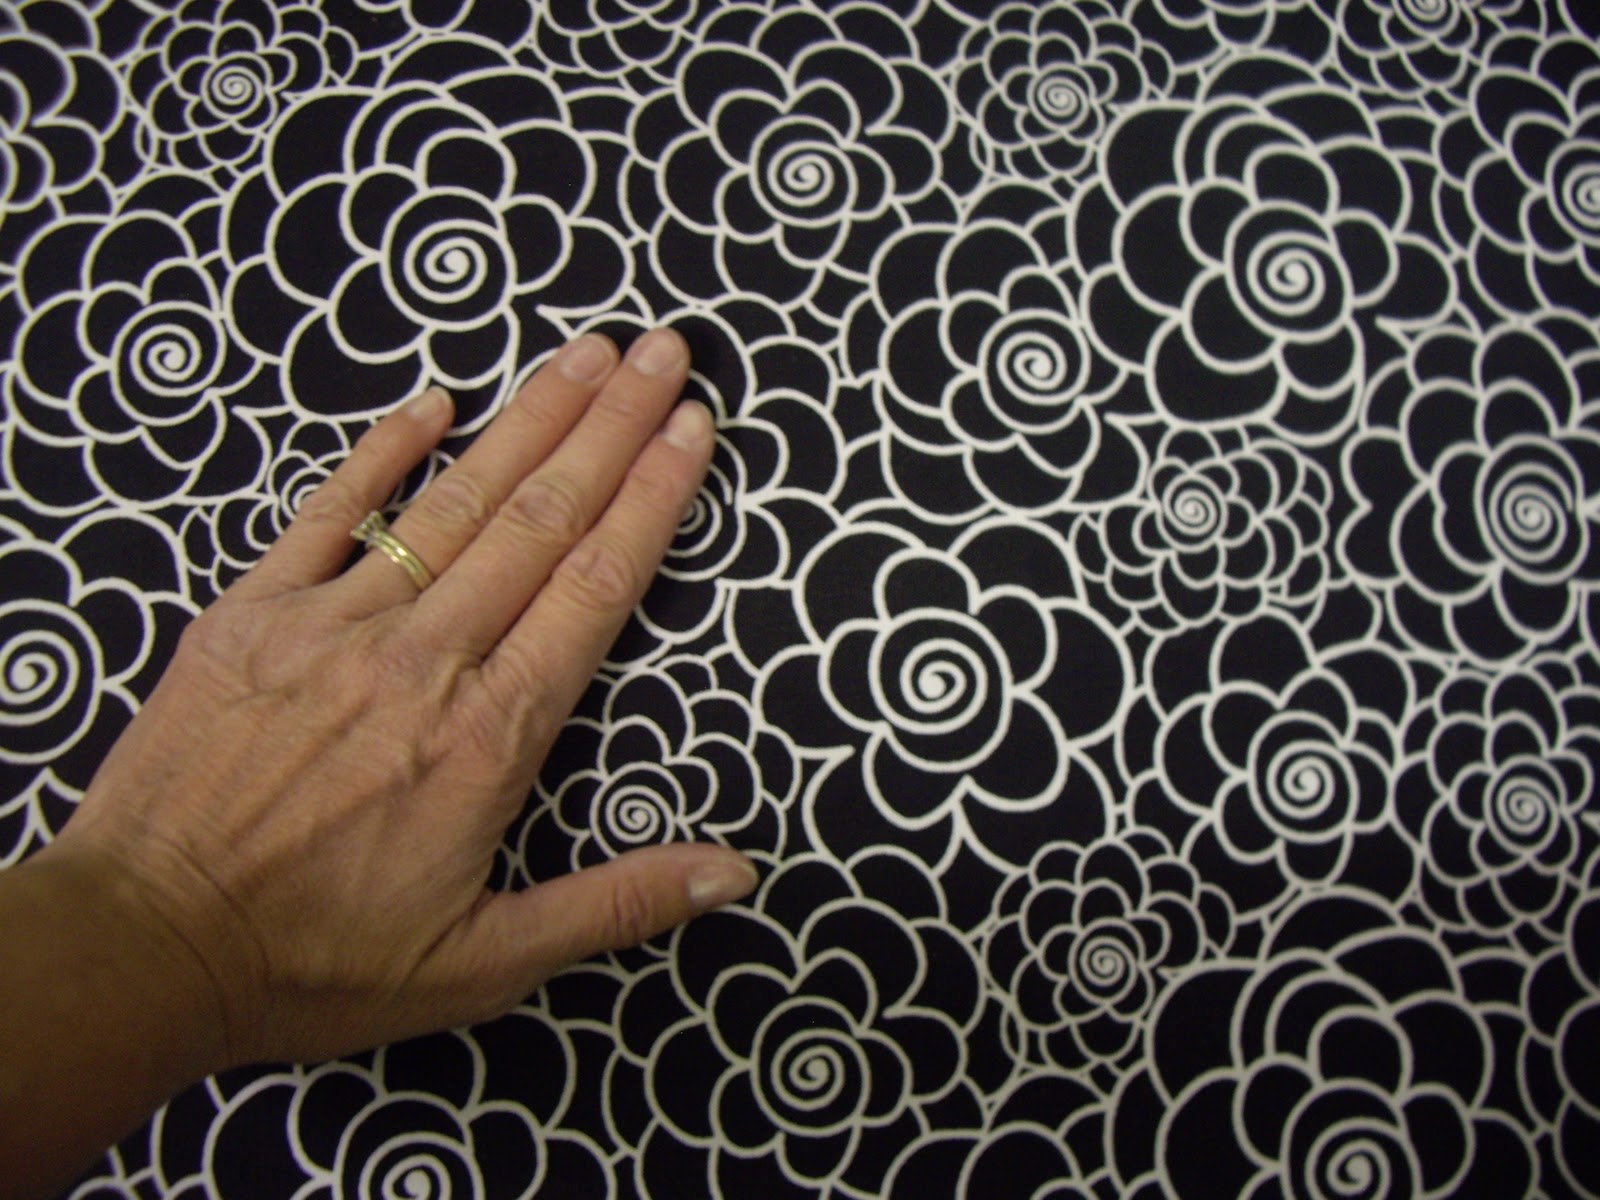
I thought it would be pretty to line the drawers and cupboards with fabric, so Little Maya and I headed over to our Hobby Lobby (we are lucky, it's only about 2 miles from our house) to pick out some fabric. Maya found this~
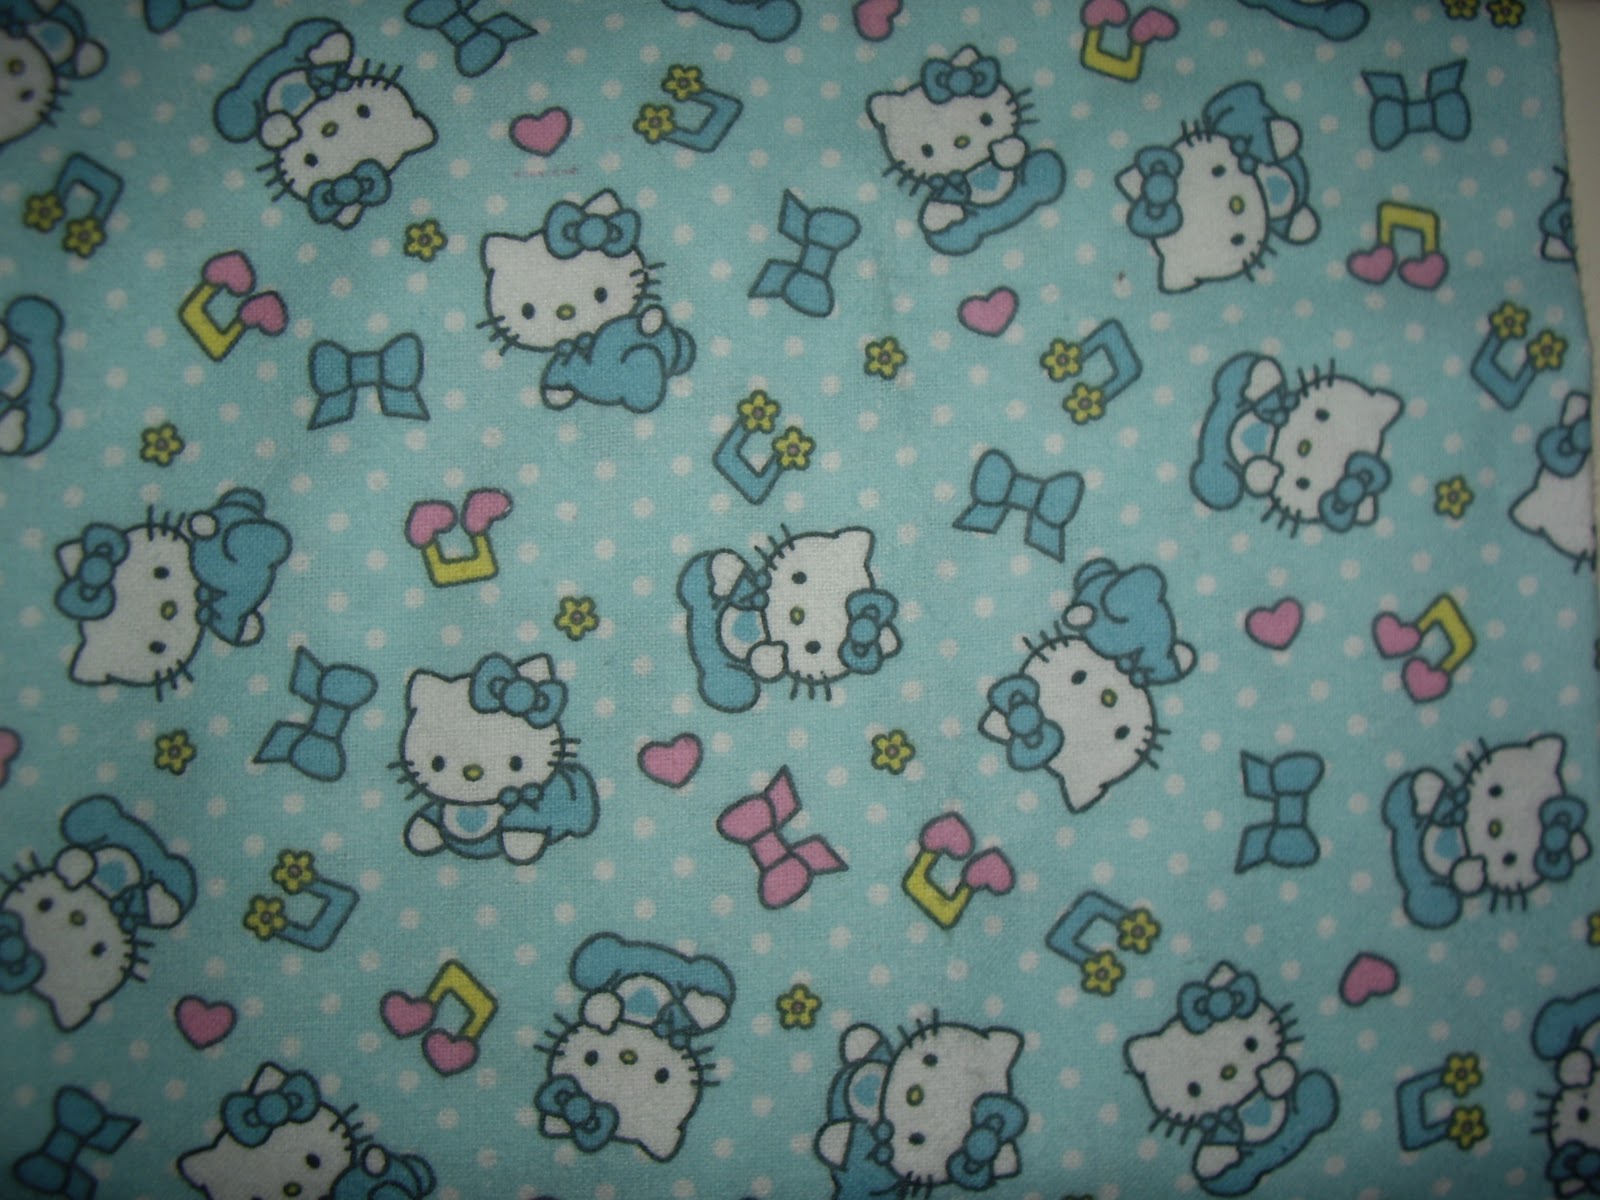
and I found this~

We were both happy with our purchase! :)
To line the cupboards and drawers, I decided to try something a bit different. Rather than mod podge the fabric to the cupboards and drawers, I bought some spray adhesive at Jo-Ann's.

It is pretty simple. After cutting the fabric and fitting it exactly to the cupboard or drawer, it's time to spray! Once I got the hang of it, I discovered that these steps worked the best for me:
1. Position the fabric exactly where you want it to be in the drawer or cupboard.

2. Pull the top half of the fabric back.
3. Spray a layer of adhesive on the upper section of the drawer or cupboard, giving careful attention to the edges.

4. Wait just a few seconds for the adhesive to turn from wet feeling to tacky.
5. Repostion the top part of the fabric back into place and press it firmly down with your hands.
6. Pull the lower half of the fabric back.
7. Spray a layer of adhesive to the lower portion of the drawer or cupboard, again, giving careful attention to the edges.

8. Wait just a few seconds for the adhesive to feel to tacky.
9. Reposition the lower half of the fabric back into place and press it firmly down with your hands.
*I found that it worked best to do this in two sections (upper and lower) because the adhesive dries and loses it's stickiness pretty quickly.
To protect and seal the fabric, I whipped out my Mod Podge~

~and brushed it over the fabric.

All done, but not quite dry! :)

I kept the original hardware and left the color as is because I thought it highlighted the distressing details.

It seems like this piece has taken me FOREVER to finish, but here it is~
Remember the before~

...and here's the after~
(Pardon the garage pics)


the outside of the drawers~

~the inside of the drawers.

Inside of the cupboard~

Distressing details~


Here's the top of the table. It's not too visible from the picture, but I had a really hard time getting an even finish here. All I could get was a kind of smokey-glazed look. I actually kinda like it!

I'm exhausted!!! :)
Have a great day!
42 comments:
Kim, I just love this. As I was scrolling down and first saw the Hello Kitty fabric I said no, please tell me she didn't choose that. Haha!! I'm going to give your idea of laying down the fabric a try, thanks for sharing!
I love how it turned out. I'm so glad you tried my distressing technique and liked it. I will have to try the spray adhesive next time. Mod Podge underneath always makes the fabric so rough, which I always have to sand smooth.
Oh wow, that was a lot of work! But all worth it, it looks gorgeous! So fun!
Kim this is amazing! And I loved this buffet from your post yesterday...so I was excited to see what you did with it :) I want to try fabric soon! Yours looks great.
What a beautiful piece! That's a great idea lining the drawers with fabric!
I love it!! How fun is that!?!?! I've been wanting to try Christa's distressing technique as well. The green inside was just the perfect fun addition. Great job!
a-mazing! absolutely wonderful. why can't i ever find anything like this, lol. stopping by from fave things fri!
www.thecapeonthecorner.blogspot.com
You really went the extra mile on this one! I bet you're exhausted...phew. It's just stunning! So classic... Love all the furniture that you do. I'd love to follow along and see what you do, next.
Blessings,
~Michelle
I love how you pay attention to every detail. And you did a great job. The credenza looks wonderful. Great tutorial!
XO,
Jane
LOVE how this turned out!!! I'm going to try out that fabric lining trick too.
this turned out beautifully, kim!!! i love the surprises inside!
I am in LOVE! What a great project.
I am visiting from Remodelaholic party. Fantastic work. I have a HPLV sprayer from Lowes that is very hard to adjust...water down paint etc. How did you like your sprayer? Did you have to put on more than one coat and did you have to sand it smooth? The finish looks lovely in the pictures. Thanks for sharing
To One Life Many Journeys :)
I do like my sprayer. With this particular spray gun, there is no need to dilute the paint, which allows one coat to be quite sufficient.
One of the things I don't like is that since I pretty much need to keep the gun shooting out straight, (you can't tilt it too much or it clogs) I have to lay a piece on it's back in order to get the top. On the credenza, I had to do a second coat on the top because of the awkward angle when it was on it's back.
A piece does seem to need a bit of a light sanding after using the spray gun.
I hope that helps!
WOW! That is beautiful!!
That came our great! Nice job!
Wow!! This piece came out just beautiful!! I love it in the black! You did a fantastic job with the finish and distressing as well. Thanks so much for joining Feathered Nest Friday and sharing this! :)
It's beautiful and I love the worn-down parts! Thanks so much for linking up to Style Feature Saturday! -shaunna :)
Nice touch painting the inside and lining it. I am impressed you really went all the way with this piece and it shows! (I redid a bureau awhile back and quit halfway thru lining the drawers it was such a pain!) Great job!
You buffet is so beautiful I love your attention to detail! I can't decide if I like the inside or outside the best! Thanks for the advice on lining the shelves and drawers. I have never tried spray adhesive but I think I will!
I love this, Kim. We have a piece that's quite similar that I'm really trying to pluck up the courage to paint.
I love the way you lined the cupboards with fabric. Was it easy to cut precisely?
Hi Sarah,
Thanks for stopping by! It was pretty easy to cut the fabric right. I measured approximately for the first cut, laid the fabric into the drawer so that two edges were fitted exactly and the other two had the extra bit hanging over. Then I took a pencil and ran it along the edge of the drawer on the two non-fitted sides -directly onto the fabic. After that, I just cut on the pencil line. It worked pretty well! :)
I LOVE THIS! What a fun surprise to open the drawers and see the fun color and fabric!
I'm now a new follower :) Come see my blog!
http://christinasadventures2010.blogspot.com/
I love the fabric and color you chose! Great job!
I'm a new follower too... Yay for new friends! jaredandlydiapierce.blogspot.com
HI there! I am your newest follower from the weekend blog hop!! I love finding new blogs and your is lovely:) You can find me at www.bouffeebambini.blogspot.com
This is lovely. Great job
Take a *peek* at my giveaways if you stop by. Everything is handmade and gorgeous!!
I love how the finish turned out. It looks beautiful!
Ahhhh...she looks outstanding!! Love how you painted the green inside...great idea. Hop over and show her off at my NIFTY THRIFTY TUESDAYS PARTY...I'm sure she will be a big hit!!
Blessings,
Linda
Kim I am azed beyond. This turned out so beautifully!!
Come and see my latest find! Would love your thoughts....truly...
Karena
Art by Karena
Amazed that is!!
Karena
Art by Karena
GREAT job! This looks marvelous! Your hard work certainly paid off! Perfectly done, really!
I hope you can join my necklace giveaway going on now!
http://alittleknickknack.blogspot.com/2010/11/rhonda-michaels-jewelry-giveaway.html
Beautiful!!
Hi Kim, Thanks so much for linking to the Sunday Showcase Party! I greatly appreciate it! I'll be featuring this today - stop by and grab a feature button if you like. Hope you are enjoying your week! ~ Stephanie Lynn
Looks awesome! Your hard work really paid off, good job :)
I just posted about your adhesive idea a couple of days ago but couldn't remember where I saw it and wanted to give credit so now I can. Love this stuff, no bubbles at all!
this turned out really pretty. I love that you painted the inside a contrasting color. The distressing looks amazing--great job!
Wow, this looks really great! I love the drawer insides!
beautiful job! I love it! I'm featuring you in a post tomorrow about buffets/hutches on crazydomestic.com. feel free to grab our "I was featured" button!
Definitely bookmarking this idea. You did an outstanding job!
-Rene
I want this--love it so much! Thanks for linking up!
Kimberly, I love your blog. I found myself laughing outloud!!! Having seen this credenza in your garage, I can write that it is an incredibly lovely piece of furniture. The lady who bought it will so enjoy having it in her home. Can't wait for the next entry.....
I bet if the person who got rid of this piece could see it now they would want it back. Great transformation. Thanks for joining the party!
Hi,
Actualy i just want to know that, Which paint sprayers better for me?
With which I can paint my house, furniture and other myself?
It would be great for me if you could tell me a little bit Please?
And How long will it last? please reply me soon. Handheld Airless Paint Sprayer
Post a Comment